

Post Categories: What do you need help with?
Starting Your Studio
Keep Your Studio Running
Making Your Studio Thrive
Stop underpricing yourself: How to confidently set prices that reflect your true worth

You’ve decided you want to start teaching, how do you choose your tuition rates to ensure that you book new students and keep them coming back year after year? Keep reading to learn how to confidently set prices that reflect your true worth.
Know YOUR WORTH!
You are setting up your business to be a money-making, profitable and SERVICE BASED BUSINESS. Just like a plumber or hair stylists, this is your job. Doesn’t matter if you’re teaching 1 or 20 students. It’s still a business that commands respect. For me, it took me years to accept and finally charge what I originally “wanted” to charge for my tuition rate. I undervalued myself and what I had to offer, which meant I had to teach more than double the number of students just to make what I needed to earn to help our family with bills. Plus it wasn’t helpful to the other teachers in the area. But having a teacher that is priced way lower than the other teachers around it creates a sort of “bidding war” and can put you or the other teachers in an awkward situation. You should create competitive yet reasonable rates.
Know WHY you believe in your worth!
You have to learn why it is okay to price yourself at your worth and not what others think you are worth. 3 items can help you justify your tuition rate:
years of experience in your own development of talent
education, college-level if any
prior teaching experience.
When I opened my doors for teaching I had already been playing piano for 18 years, and horn for 15 years. I went to college and got a music degree AND had already been teaching for 10 years. Yet, I still under priced myself by $10 a lesson. And it took me YEARS of increasing my rates and finally moving to a new location where I could set my rate starting what I wanted and go up from there. I don’t want you to make the same mistakes I did. So here are a few tips I recommend.
🎶 Tip 1: Try to scout out your local area on what other teachers are charging for tuition. Base your rate around that and the 3 qualifiers above.
🎶 Tip 2: List in your studio policy what your monthly tuition includes! Include that your tuition is for private lessons, and also your time outside of lessons, overall music experience, and how many recitals you’re hosting a year.
🎶 Tip 3: Be confident when talking about your tuition. If you aren’t confident, whomever you are talking to will pick up on that and you could run into issues down the road with that family.
🎶 Tip 4: You can always increase your rates at a later date either for existing students or just for new incoming students or both.
Remember, you’re not going to be able to teach everyone. But also, it’s your business you can run it how you want, from creating “scholarship” opportunities to help offset the cost for a student, to reduced lesson costs for those in financial difficulties. I’ve even offered gift cards/pre-paid lesson opportunities which come in handy for holiday gifts or birthdays.
LAST THING: the minute someone starts to take advantage of you, from missing lessons, and expecting you to reduce their tuition due to missed lessons to paying past the due date. They aren’t respecting you or your business. Talk to them and let them know that this business is just as important to you as their job is to them. Give them one more chance and if they are late again, or continue the same pattern of behavior, then it’s time to terminate. In the end, you might lose a student, but there are always more waiting to join your studio, and to be respected is more than any money earned.
Happy Teaching!
10 Must-Know Tips for Starting Your New Music Studio Business and Succeeding

Starting a new business in music teaching? Let’s get you started right from the start with this Check list!
1) HAVE A STUDIO POLICY! This sets the expectations on who you are as a teacher and what you expect from your students. Must include: how often you teach, tuition rate, the due date for payments, Missed lessons, and make up lesson rules AT A MINIMUM. Not sure how to get started with writing a studio policy, you can get my ironclad and customizable template here: STUDIO POLICY TEMPLATE COURSE
2) Have a set location or plan in where you are going to be teaching. Will you do it in your house, rent a space, travel from house to house? Have that in place before you start advertising.
3) Advertise. This is obvious, but advertise on Facebook in the local community chats, anytime someone posts about a music teacher be the one to respond and send a message. Post on your regular feed, and on Instagram. Get loud at local events, and always carry business cards with you. Post at local coffee shops or other places with community boards.
4) Learn the rules of your county and state for having a local small business and obtain whatever you need to obtain to reduce fees later on or risk being shut down later.
5) Decide how many students you can teach and your teaching schedule
6) Decide what levels you’re going to teach (beginning, elementary, intermediate, advanced)
7) Decide what method books you’re going to use and get familiar and comfortable with the flow and various songs.
8) Start thinking about where and how you can host a recital so that you have time to plan in advance.
9) Create fun and exciting activities for the students to keep them excited and engaged so they practice at home and want to keep coming back week after week.
10) DON’T forget that you are running a business. You set the hours, days, and tuition. Don’t feel pressured into making changes from your plans to accommodate someone else.
Keep checking the site for more tips on how to start your music studio, keep it running, and building a successful and Thriving music studio!
Happy Teaching!
Master Your Recital Performance with These Pre-Recital Practice Tips

Spring is HUGE for spring recitals! I personally spend at least 2 weeks working on recital prep with my students. We act out how they will get onto the “stage”, bowing, performing (including releasing the final note and what to do with their hands or instrument) final bow, and then returning back to their seats. We do this over and over each week to just make it super easy for even the youngest student to remember come recital time when nerves are high.
Recital prep starts 3 weeks before the recital date. I’ll explain why below. But first…
🎶 Secrets to Success: How we do recital prep in my studio
1) Pick a place near your piano to have the student sit in while they wait “their turn” to come on stage.
2) Introduce them as you will in the recital, with their name and the title of their piece. After their name is called they will then come on stage, place their music on their stand or bench of the piano and turn to the audience to bow, then they will sit and prep to play.
3) I always instruct my students to take a deep inhale before they begin playing, again as a way to help reduce the nerves.
4) Once they are done playing, hands gently in their lap then stand and SMILE (at their mom) and take their bow. They then depart the stage back to their seat. I keep the music and will hand that back to them at the end —one less music rustling around while other kids are playing. You could collect their music beforehand as well, but I found most kids like having something to hold on to help them not fidget so much.
ALWAYS, whenever someone is bowing, each student should clap just like they want to be clapped at when they perform. We even practice clapping in lessons.
3 weeks before the recital we practice this process at least 3 times before we move on to other music if there is time. Lots of talking and explaining each step, and how to bow (hands at their side not in front and back)
2 weeks before the recital we have “Distraction Week”. This is where I enlist my children to pretend to be the most noisy audience ever. My kids will literally try to distract my student while they are playing. The goal, the student can ignore all distractions. But I still call them up and have them bow and follow the same step-by-step process.
The week of the recital is recital prep week. Shortened practices because the point is to run through their recital piece 3 times following the steps of sitting in their seat, being called up, bowing, playing, bowing, and returning to their seats. By this point, they have got it down. So the lesson will be super short anyways and you don’t want your students playing their sone more than 3 times anyways.
Happy Teaching!
Unleash Your Inner Musician: How Teaching Private Music Lessons Can Take Your Musicianship to the Next Level

There’s one thing to be able to do something, but teaching others, that’s a whole new ball game. I remember when I decided to start teaching, I literally sat down at my piano and thought, “how the heck did I learn how to do this?” Because, I don’t really remember the first few years of learning. It was just something I went to and didn’t become an enjoyable passion until I was in 7/8th grade. By being a teacher you have to internally reflect and always learn changing ways to help students excel.
You have to learn how to explain musical concepts and techniques clearly to your students. And as it’s an ever growing and learning experience you will develop new techniques over time as you evolve as a teacher. Don’t feel boxed in that you have to teach a specific way. Create what works for you that conveys the proper information.
Sit at your instrument and work through it. How did I learn to play this? How do I do this? When did I learn scales or other techniques? How do I show someone how to…The list goes on.
Plus don’t just sit with your instrument thinking, you have to lead by example. Rework your own technique. Sit down and drill out those scales. Revisit some old songs you learned back in the day. How can you improve them now. Or learn a new song or 2. Just start back into your own playing.
Is there an organization you can participate with? A music club, community ensemble, band, choir, orchestra. Join those groups for the experience of rehearsing and performing on a regular basis.
🎶 Each teacher will have their own style in how they present ideas. Some people refer to “ C” as home note, or the C scale. For my younger kids I teach positions before I teach pentascales or full scales. We call it C Position, “CPOS” or Middle C Position “MCP” (when the thumbs are sharing middle C) and as the student progresses I teach the full meanings terminology. Your goal is to create terms that work best for your students.
Remember, your goal as the teacher is to teach as much as you can in the time you have available. Each student is going to learn differently and you have to lean into that as a teacher. Just keep trying new ways that work for you and your students.
Happy Teaching!
How To Start Teaching Music Lessons: A Complete Checklist for New Music Teachers
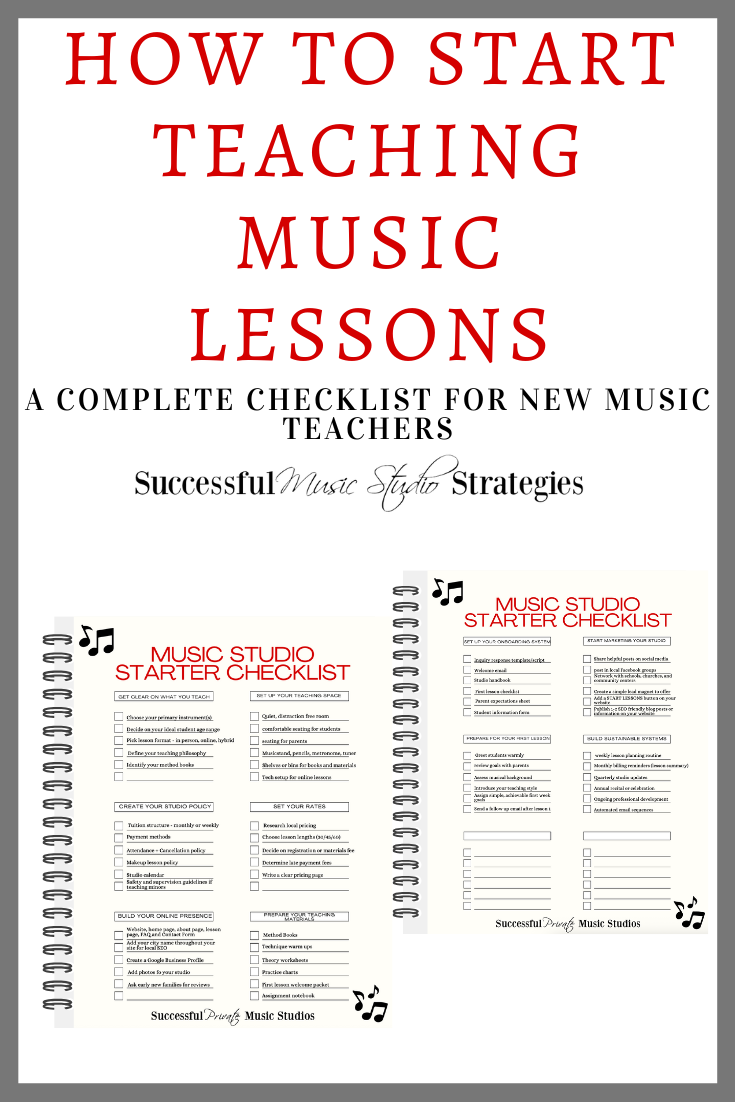
Starting to teach music lessons is an exciting step—whether you’re hoping to build a small studio from home, teach online, or grow a full teaching business. If you love music and enjoy helping others learn, teaching lessons can be a rewarding and flexible way to share your skills.
This guide walks you through the essential steps to begin teaching music lessons with confidence, clarity, and a strong foundation that supports both you and your students.
Understanding Your Teaching Focus
Before you begin, take time to define what you want your teaching to look like. This helps you stay focused and attract the right students.
Think about:
The instrument(s) you want to teach. Have a primary and a secondary to help fill out your studio if you can. (I teach French horn as my primary instrument and use piano to fill out my studio.)
The ages or levels you enjoy working with.
Whether you prefer in‑person lessons, online lessons, or a mix
The teaching style or philosophy you want to bring into your studio
Having a clear direction makes every next step easier.
Setting Up Your Teaching Space
Your teaching space doesn’t need to be fancy—it just needs to be functional, comfortable, and welcoming.
A good lesson space includes:
A quiet room free from distractions (I’ve raised 3 kids while teaching any my space is not always quiet but it’s preferred)
Adequate lighting, or stand lights (have 2, one for use during the lesson and one charging)
A music stand, pencils, and basic supplies
A comfortable place for students to wait (and parents, if needed)
For online lessons: a stable internet connection, camera, and microphone
A well‑prepared space helps students feel at ease and ready to learn.
Creating Your Studio Policies
Clear studio policies protect your time, set expectations, and help families understand how your studio works.
Your policies should cover:
Tuition and payment schedule
Attendance and cancellations
Makeup lessons
Communication guidelines
Studio calendar and holidays
These policies become the backbone of your studio and help everything run smoothly.
Done for you
Don't want to write your policy from scratch?
The Basic Music Studio Policy Template is a fully written, fully customizable contract you can hand to your first family on day one. It covers everything above — tuition, cancellations, makeups, communication, and holidays — plus a 17-minute tutorial video that walks you through every section.
Get the done-for-you policy template →One-time · $125 · Instant access · Works in Word and Mac Pages
Deciding on Your Rates
Setting your rates is an important step in establishing your studio. Consider your experience, local pricing, and the value you bring to your students.
Decide on:
Lesson lengths (30, 45, or 60 minutes)
Monthly or weekly billing
Whether you’ll charge registration or materials fees
Once you choose your rates, keep them consistent and communicate them clearly.
Creating a Simple Website
A website helps families learn about your studio, understand what you offer, and contact you easily. It doesn’t need to be complicated—just clear and welcoming.
Include:
A homepage that introduces your studio
An About page that shares your story
A Lessons page that explains what you teach
A FAQ page for common questions
A contact form
Your website becomes the central place where families can learn about you and take the next step.
Preparing Your Teaching Materials
Before your first lessons, gather the materials you’ll use regularly.
This may include:
Method books
Technique warm‑ups
Theory worksheets
Practice charts
Assignment sheets
A welcome packet for new students
Having these ready helps you start strong and stay organized.
Creating a Smooth Onboarding Process
A warm, clear onboarding experience helps new students feel supported from the very beginning.
Prepare:
A welcome email
A studio handbook
A student information form
A first‑lesson checklist
A simple way for families to ask questions
This sets the tone for a positive, long‑term relationship.
Getting Ready for Your First Lessons
Your first lessons are all about connection, clarity, and setting expectations.
During the first lesson:
Greet students warmly
Learn about their goals
Assess their musical background
Introduce your teaching style
Assign simple, achievable goals for the week
Follow up afterward with encouragement
These early moments build trust and excitement.
Building Systems That Support You
As your studio grows, systems help you stay organized and consistent.
Consider routines for:
Lesson planning
Billing
Communication
Recital planning
Ongoing professional development
Ready to go deeper?
Want the complete system I used to build two thriving studios?
My Getting Started Online Course walks you through every step — pricing, branding, marketing, student retention, and more. Over 2.5 hours of video content built specifically for new studio owners who want to do this right from day one.
See the Getting Started course →Part 1 of the Complete Studio Strategies Course · $500
Free Download: Music Studio Starter Checklist
To make your journey even easier, download the Music Studio Starter Checklist—a simple, step‑by‑step guide that walks you through everything you need to launch your teaching studio with confidence.
It includes:
Teaching focus
Space setup
Policies
Rates
Website essentials
Teaching materials
Onboarding
First‑lesson prep
Marketing basics
Sustainable systems
It’s the perfect companion as you begin teaching music lessons.
Happy Teaching!
Becky
What do you want to tackle next?
You've got the overview — here are the best next steps depending on where you are right now.


I’m Becky and Welcome To Successful Music Studio Strategies where I help you create your own Successful Private Music Studio business through simple strategies I’ve learned and used in my own successful private music studio! Want to learn more about my online courses to help you start, build and create a successful and THRIVING music studio? Click here!