

Post Categories: What do you need help with?
Starting Your Studio
Keep Your Studio Running
Making Your Studio Thrive
How to Start a Music Studio from Scratch (Without the Overwhelm)
A step-by-step guide for new music teachers who are ready to turn their passion into a real, profitable business.
So you've decided to start a music studio. Maybe you've been teaching a few students informally, or maybe this is a brand new idea still bouncing around in your head. Either way — welcome. You're in the right place.
Starting a private music studio is one of the most rewarding things you can do as a musician and teacher. But if you've ever Googled "how to start a music studio," you know the results are... a lot. Conflicting advice. Vague tips. Nothing that actually tells you what to do first.
That's exactly what this post is for. Let's walk through the foundational steps — in order — so you can stop overthinking and start building.
Step 1: Start with a real business plan
I know, I know. "Business plan" sounds intimidating. But it doesn't have to be a 40-page document. For a private music studio, your business plan is simply a clear picture of what you're building, who it's for, and how you'll sustain it.
Ask yourself: How many students do I want? What instrument(s) will I teach? Will I teach in-home, in a rented space, or online? Who is my ideal student — beginners, advanced players, adults, children?
Getting these answers on paper before you do anything else will save you hours of second-guessing later. It becomes your decision-making filter for everything that follows.
Step 2: Set your rates with confidence
Pricing is where most new studio owners get stuck — and where most undercharge. Setting your rates too low is one of the most common and costly mistakes in this business, and it's surprisingly hard to fix once parents expect a certain number.
A few things to factor in when setting your rates:
Your local market rate (what are other teachers in your area charging?)
Your experience, credentials, and specializations
Your income goals — reverse-engineer your monthly target
The cost of your time, materials, and overhead
Don't price based on what you think people will pay. Price based on what you need to make your studio sustainable — and then build the confidence to stand behind it.
Step 3: Build your studio policies before you take your first student
This is the step most new teachers skip — and they regret it almost immediately. Studio policies aren't just bureaucratic paperwork. They are the foundation of a professional, respectful relationship with your students and their families.
A solid studio policy covers:
Cancellation and make-up lesson procedures
Payment terms and due dates
Scheduling and availability boundaries
Communication expectations (how and when to reach you)
Student and parent behavior expectations
Setting these expectations from day one prevents the awkward conversations that drain your energy and erode the teacher-student relationship. The time to establish your policies is before problems arise — not after.
Step 4: Build your brand
Your brand is more than a logo. It's the feeling people get when they land on your website, receive a message from you, or walk into your studio space. It's the reason a parent chooses you over the next teacher on the list.
You don't need to hire a designer or spend thousands on branding. You need:
A clear studio name that's memorable and searchable
A consistent color palette and font style
A professional profile photo
A simple, clean website with your rates, contact info, and a way to enroll
Consistency is more important than perfection. Show up the same way every time, and trust builds naturally.
Step 5: Follow a launch roadmap — don't just wing it
The difference between teachers who launch successfully and those who stay stuck in "almost ready" mode is usually one thing: a plan with deadlines.
A 30-day launch roadmap breaks your studio launch into small, daily actions so that you always know exactly what to do next. No more decision fatigue. No more blank-page paralysis. Just momentum.
Whether you're launching in 30 days or 90, mapping out your milestones ahead of time gives you something to move toward — and something to celebrate along the way.
Ready to go deeper?
These five steps will get your studio off the ground. But building a studio that's truly profitable, sustainable, and fulfilling over the long haul takes more — it takes systems. For pricing, marketing, student retention, bookkeeping, recitals, and growth.
That's exactly what the Successful Music Studio Strategies Course is built for.
Not ready for the full course yet? Start with the Music Studio Startup Toolkit — just $50, and it's the perfect first step.
Happy Teaching!
Becky
Free Guide: Build a Stronger Music Studio Policy in Just 5 Steps!
Crafting the perfect studio policy can be overwhelming, but having a rock-solid foundation makes all the difference! If you're building—or refining—your Private Music Studio Policy, make sure you're covering the essential elements that protect both you and your students.
But here's the catch—rather than giving everything away here, I’ve created a FREE download that lays out the 5 essential elements you absolutely need to include in your policy. If you want a truly structured and effective agreement, this ebook will guide you through the process step-by-step.
Why is a Studio Policy So Important?
Your studio policy isn’t just a formality—it’s the agreement that ensures clarity and professionalism in your teaching business. Without a strong policy, you may run into:
✅ Unclear lesson commitments
✅ Payment confusion
✅ No-shows or last-minute cancellations
✅ Unexpected student withdrawals
✅ Lack of accountability
Get Your Free Guide!
Rather than guessing what should go into your policy, I’ve already done the work for you. My FREE ebook—5 Essential Elements for a Rock-Solid Private Music Studio Policy—covers the key details you need to make sure your policy supports your business and keeps things running smoothly.
Grab your copy today! Don't leave your studio policy up to chance—set yourself up for success from the start. Download it now and take control of your studio! 🎵
Happy Teaching,
Becky
What Your Music Studio Website Actually Needs (And What to Skip)
At some point between deciding to open your studio and actually getting students through the door, someone tells you that you need a website. So you build one — or you pay someone to build one — and you throw everything on it. Your degrees, your resume, a photo gallery, a blog, a contact form, a calendar, a YouTube video, a list of policies, a pricing page, and a button to buy a gift card.
And then you wonder why inquiries are slow.
Here's the thing: more pages does not mean more trust. A cluttered, unfocused website actually works against you — it makes families feel like they have to do homework just to figure out whether you're a good fit. Most of them won't bother. They'll click away and find someone whose site is easier to understand.
Your website has one job: to take a parent from "I found this teacher" to "I want to contact her" as quickly and clearly as possible. Everything on the site either supports that job or distracts from it.
Here's what actually belongs on a private music studio website — and what you can leave off entirely.
The 5 Pages Your Studio Website Needs
1. A Homepage That Answers the First Three Questions
A parent landing on your homepage for the first time has three questions in their head before they even realize it:
Is this person in my area?
Do they teach what my child wants to learn?
Do they seem like someone I'd want to work with?
Your homepage needs to answer all three — fast. That means your very first section should include: your instruments, your location (or "online lessons available"), and a brief statement that communicates your personality or approach. Not a lengthy welcome speech. One or two sentences that feel like you.
Below that, you need a clear call to action — a button or link that says something like "Learn More" or "Contact Me to Enroll." Don't make parents hunt for how to reach you.
Everything else on the homepage (photos, testimonials, a quick look at what's included, a short bio blurb) supports those three answers. It doesn't replace them.
2. A Lessons Page That Explains What You Offer
This is where parents get the details: what instruments you teach, what ages and levels you work with, lesson length options, and your general schedule or availability. You don't have to list every single slot — just enough that they understand what a lesson with you looks like.
If you have a pricing range or a starting rate, include it here. Many teachers are afraid to list their rates, but hiding them often backfires. Parents who can't find your pricing frequently assume the worst — or just move on to someone who's more upfront. You don't have to list every tier. "Piano lessons starting at $X/month" is enough.
This page should also include a call to action at the bottom. Every page on your site should make it easy to take the next step.
3. An About Page That Sounds Like a Person
This is your bio — and it's more important than most teachers realize. (I wrote an entire post on how to write this well, which you can find here.)
The short version: your About page should feel like a real conversation, not a resume. Credentials matter — but they're not what makes parents choose you. Your teaching philosophy, your personality, and your clarity about who you work with best are what make the difference.
Include a good photo. This is non-negotiable. Parents want to see who their child will be spending 30–60 minutes with every week. A clean, friendly photo — not a performance headshot, not a grainy selfie — makes a real difference in how professional and approachable your studio feels.
4. A Contact Page That Is Extremely Easy to Use
Your contact page should have: a simple form (name, email, and a message box), your email address (for parents who prefer direct email), and ideally your general location — city and state, at minimum — so families know you're within driving distance before they reach out.
That's it. You don't need a phone number unless you actually want parents calling you. You don't need your full address unless you have a physical studio location and want families to find it easily.
One thing to check: make sure your contact form actually works and that the messages reach your inbox. Test it. You'd be surprised how many teachers are losing inquiries because their contact form is broken and they don't know it.
5. A Studio Policies Page (Or a FAQ)
This is where you answer the questions parents always ask before they enroll: How do cancellations work? When is tuition due? Do you offer makeup lessons? What do students need to bring?
You don't have to post your full studio policy document here. A clean FAQ format works well — short questions, clear answers. The goal is to help parents feel informed and reduce the amount of back-and-forth before the first lesson.
If you don't have a solid studio policy written yet, that's worth addressing before you build this page.
Don't Have a Studio Policy Yet?
Studio Policy Templates — Basic & Advanced
Done-for-you policy templates built for private music teachers. Covers tuition, cancellations, makeups, scheduling, communication, and more. Includes a tutorial video and works in Word and Mac Pages. Just customize and hand it to your first family.
What Your Homepage Actually Needs to Say
I want to spend a little more time on the homepage because it's the most visited page on your site — and the most commonly done wrong.
The single most important thing on your homepage is clarity about who you are and what you offer. Not a beautiful banner image. Not an animated slideshow. Not a philosophical statement about the transformative power of music. Those things are fine as supporting elements, but they don't replace a clear, direct answer to "what is this studio and should I care?"
Think about it from the parent's perspective: they've probably Googled "piano teacher near me" or found you through a referral. They land on your page. In ten seconds or less, they need to know: instruments, location, who you work with, and that you seem like a real, trustworthy person. If your homepage doesn't deliver all four of those things quickly, you're losing people before they even get to your About page.
A few small things that make a big difference:
A real photo of you. Not a stock photo of a piano. Not your logo. You. Smiling. In a place that looks like your studio or somewhere professional. Parents are entrusting you with their child — they want to see a face.
Social proof near the top. If you have a testimonial or two from current families, put one near the top of the homepage. Even a single short quote from a happy parent does more for trust than a full paragraph about your credentials.
A button that's hard to miss. "Contact Me," "Inquire Now," or "Check Availability" — whatever language fits your studio. Make it a button, not a text link. Make it a color that stands out. Put it somewhere in the first section of the page, and again at the bottom.
New to Studio Life? Start Here.
Music Studio Startup Toolkit
A 65-page guided workbook covering your business plan, pricing, branding, website essentials, and a complete 30-day launch roadmap. Everything a new teacher needs to build a professional studio from the ground up — in one place, at one price.
$50 one-time · instant download
Get the Toolkit →What You Can Leave Off (At Least for Now)
A blog — Blogs are great for SEO and for building authority over time, but they are not essential when you're first launching. An empty or rarely updated blog actually hurts more than it helps — it signals that the site is neglected. Start a blog only when you can commit to adding to it consistently.
A full photo gallery — A handful of great photos scattered through the site is better than a dedicated gallery page. If you don't have professional studio photos yet, one good headshot and maybe a photo of your piano or music space is enough.
An online scheduling calendar — This can be useful later, but it adds complexity early on and can overwhelm parents who are just trying to find out if you have any openings. A simple contact form works fine when you're building your studio. Add scheduling tools once you're at capacity and managing a waitlist.
A lengthy biography — Your full bio lives on your About page. Your homepage needs a short, human intro — three to five sentences at most. The detailed version is one click away.
Social media feeds embedded on your site — These are visually noisy, often slow down page loading, and frequently pull in old or off-brand content. Link to your social profiles instead — a simple icon in the footer is all you need.
One Final Check Before You Publish
Before you send anyone to your website, run through this quick checklist:
Does the homepage answer: what instruments, what location, and what kind of teacher in the first few seconds?
Is there a clear, visible way to contact you on every page?
Does your About page include a real photo of you?
Does your site look and feel consistent with the rest of your branding (colors, fonts, tone)?
Does your contact form actually work? (Test it from a different email address.)
Is the site readable on a phone? Most parents will find you on mobile first.
If you can say yes to all six, you have a website that's ready to do its job.
It doesn't need to be perfect. It needs to be clear, professional, and easy to navigate. Start there — and improve it as you go.
Happy Teaching!
Becky
Crafting the Perfect Welcome Packet for New Students: Setting the Stage for Success and Connection
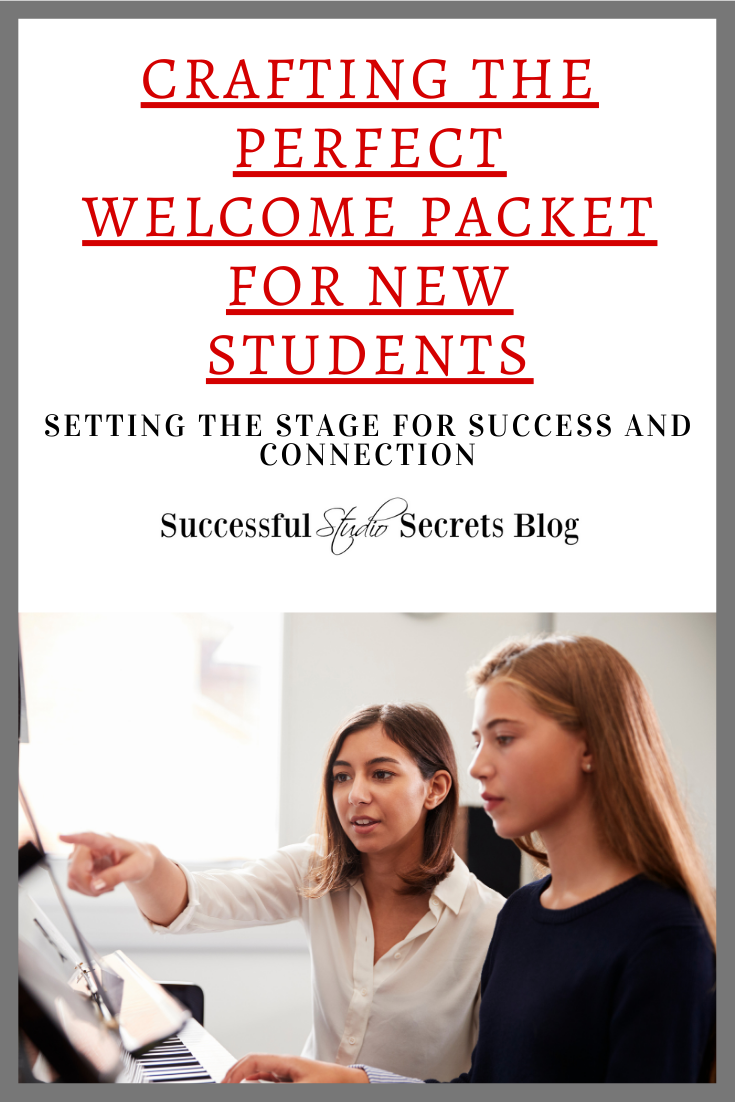
First impressions matter, especially when welcoming new students into your studio. A thoughtfully designed welcome packet is your opportunity to make a lasting impression, set clear expectations, and create a foundation for a strong relationship with your students and their families. Whether you’re a seasoned teacher or just starting your music studio, a welcome packet is an essential tool to communicate professionalism and build trust. Let’s dive into why you need one and what to include.
Why Create a Welcome Packet?
Establish Professionalism A well-prepared welcome packet shows that you take your role as an instructor seriously. It sets the tone for a professional and organized learning environment.
Set Clear Expectations By outlining policies, schedules, and expectations, you provide clarity and prevent misunderstandings. A welcome packet ensures everyone is on the same page from day one.
Build a Connection Personal touches in your welcome packet help new students and their families feel valued. It’s a great way to introduce yourself, your studio’s philosophy, and your teaching approach.
Streamline Communication A welcome packet serves as a one-stop resource for important information, reducing the need for back-and-forth emails or phone calls.
What to Include in Your Welcome Packet
Personal Welcome Letter Start your packet with a warm and enthusiastic letter. Introduce yourself, share your passion for teaching, and express excitement about working with the student. This personal touch creates an immediate connection. Include in the letter, date of first lesson, and time and where lessons are held—I like to include a hyper link to where you teach to make it easy for the parents to find your location.
Studio Policies Outline your policies in a clear and friendly manner. Include details on:
Attendance and cancellation policies.
Payment terms and methods.
Practice expectations.
Online lesson protocols (if applicable). Clear policies help set boundaries and create a smooth experience for both you and your students.
First Payment Due Include a copy of their first Summary of Tuition and fees due and when it is due by. You can choose to have an application fee for them to pay before the lesson to “secure and reserve” their spot in your studio.
Studio Calendar Provide a calendar with important dates, including holidays, recital dates, and any studio closures. This helps families plan ahead and stay informed.
Creating Your Welcome Packet
Digital vs. Physical Format: Decide whether to provide your welcome packet digitally (as a PDF) or as a printed handout. Digital packets are convenient and eco-friendly, while physical packets add a personal touch. I tend to make all my paperwork PDF and send them over email instead of mailing them out.
Design Matters: Use tools like Canva or Microsoft Word to design an organized and visually appealing packet. Incorporate your studio’s logo, colors, and branding to create a professional look. Part 1: Getting Your Studio Started online course has an entire lesson dedicated to making your welcome packet with all the templets and wording included!
Keep It Updated: Review and revise your welcome packet regularly to ensure it reflects any changes in policies, fees, or contact information.
The Power of a Great Welcome Packet
A welcome packet isn’t just a bundle of papers—it’s an extension of your studio’s identity. It showcases your professionalism, reinforces your commitment to your students’ success, and fosters trust from the very beginning. By investing a little time and effort into crafting a well-rounded packet, you’ll set the stage for a rewarding and lasting relationship with your students and their families.
Your teaching journey is as much about connection as it is about education. Let your welcome packet be the first step toward making every student feel at home in your studio.
Happy teaching!
Unlock Your True Worth As a New Teacher: A guide to pricing your lessons for success

Starting your new music studio is an exciting adventure filled with creativity, passion, and a vision for the future. But alongside the joy of pursuing your craft, one crucial question looms: How much should I charge for my services? Setting your prices is more than just picking a number—it’s about valuing your expertise, ensuring sustainability, and building a thriving business. Let’s break down the two key things to think about as you establish your pricing.
1. How Much Do I Charge?
The first step in pricing your services is understanding the area and the prices of the local teachers that you are teaching in:
Research Your Market
Look at the going rates in your area for music lessons. What are other music teachers charging? ?
Don’t just copy what others are doing. While local rates provide a baseline, your pricing should also reflect the value and experience you bring.
Align with Your Financial Goals
Think about your business goals: you can then start to think about how much income you want or need to make.
Calculate how many lessons you can realistically offer each week while maintaining quality and balance in your life.
2. How Do I Figure That Out?
Based on the prices of the teachers in your area, that’s the Goldilocks range you want to be in. No more than a couple dollars higher or lower than that rate. And, don’t undercut your prices to get more students. It will take you twice as long to earn what you should be earning per lesson.
Decide on a Pricing Model
Here are some common models to consider:
Per Lesson: A straightforward option where clients pay for each lesson individually.
Monthly Packages: Offer a consistent monthly fee that includes a set number of lessons, encouraging commitment from students.
Tiered Pricing: Provide options for different lesson lengths (e.g., 30 minutes, 45 minutes, or 60 minutes) or levels of involvement (e.g., beginners vs. advanced students).
Factor in Flexibility and Policies
Create policies around cancellations, rescheduling, and missed lessons. Will you charge full price for last-minute cancellations, or do you offer make-up lessons? Clear policies help protect your time and income.
Adjust your rates over time. As you gain more experience or invest in new skills, don’t hesitate to increase your prices to match your enhanced value. You can send out a notice to existing students or just increase your rates for new, incoming students.
Communicate Your Value
Confidence is key when discussing your rates with potential clients. Explain the benefits of working with you—your qualifications, personalized instruction, and the results students can achieve through your lessons. Include that in your studio policy as well.
Remember, clients aren’t just paying for your time; they’re paying for your expertise, preparation, and the overall value you provide.
Pricing your services is about striking a balance: you want to reflect your value while staying competitive and fair. Remember, your time, knowledge, and passion for teaching music are worth investing in. When you confidently price your services, you not only unlock your true worth but also set the foundation for a successful and sustainable music studio.
Go ahead and take that first step. You’ve got this! 🎶
Happy Teaching!


I’m Becky and Welcome To Successful Music Studio Strategies where I help you create your own Successful Private Music Studio business through simple strategies I’ve learned and used in my own successful private music studio! Want to learn more about my online courses to help you start, build and create a successful and THRIVING music studio? Click here!